Techniques and applications
Tool engraving: clear inventory numbers for your team
Use stable numbers, appropriate marking positions and an up-to-date register to identify tools across your team.
Tool engraving for a stable identity
Tool engraving works best when the marking suits daily working practice. A company name helps identify ownership. A unique inventory number links the item to a register of model, user and maintenance. Choose a number that remains useful when people or teams change.
Company name, team code or individual number?
The right content depends on the problem. A short company name may prevent identical spanners from two businesses getting mixed up. To identify the particular item loaned or checked, use a unique number. Marking and register must use exactly the same reference.
A fixed code such as SD-0017 is often easier to manage than one combining name, van number, department and year. Those details may change. Keep variable information in the register and the physical code stable. SD-0017 is a fictional example, not a prescribed numbering system.
Use existing asset numbers if they already work well. A second independent system can add confusion. Agree who allocates new numbers and how duplicate use is prevented.
A suitable position matters more than a large logo
Choose an accessible surface visible in normal use. Mark the intended position on a photograph and give width and height. Pliers, sockets and spanners differ in shape; a consistent appearance does not require identical dimensions everywhere.
Keep existing measurements, warnings and manufacturer information recognisable. Identify surfaces used for grip, fitting, cutting or contact. A desired design does not justify processing a functional or heavily loaded part without assessment.
For insulated, calibrated, inspected or otherwise specialised tools, manufacturer requirements and use conditions are especially relevant. Establish whether and where marking is permitted beforehand. SDLG assesses the engraving specification; this does not constitute a new safety or calibration approval.
Material matters too. Bare metal, chrome plating, paint and plastic handles can respond differently. A brand on the packaging does not identify every component’s material. Supply a detail photograph of the intended area as well as an overview.
Technical background: Trotec on different metal marking processes. Your tool’s suitability is assessed separately.
Tool engraving: prepare and check in 4 steps
For a set of different models, avoiding mix-ups is a major part of preparation. Give each supplied item a temporary recognisable reference matching the list. Twenty similar items in a box and twenty separate numbers leave unnecessary room for interpretation.
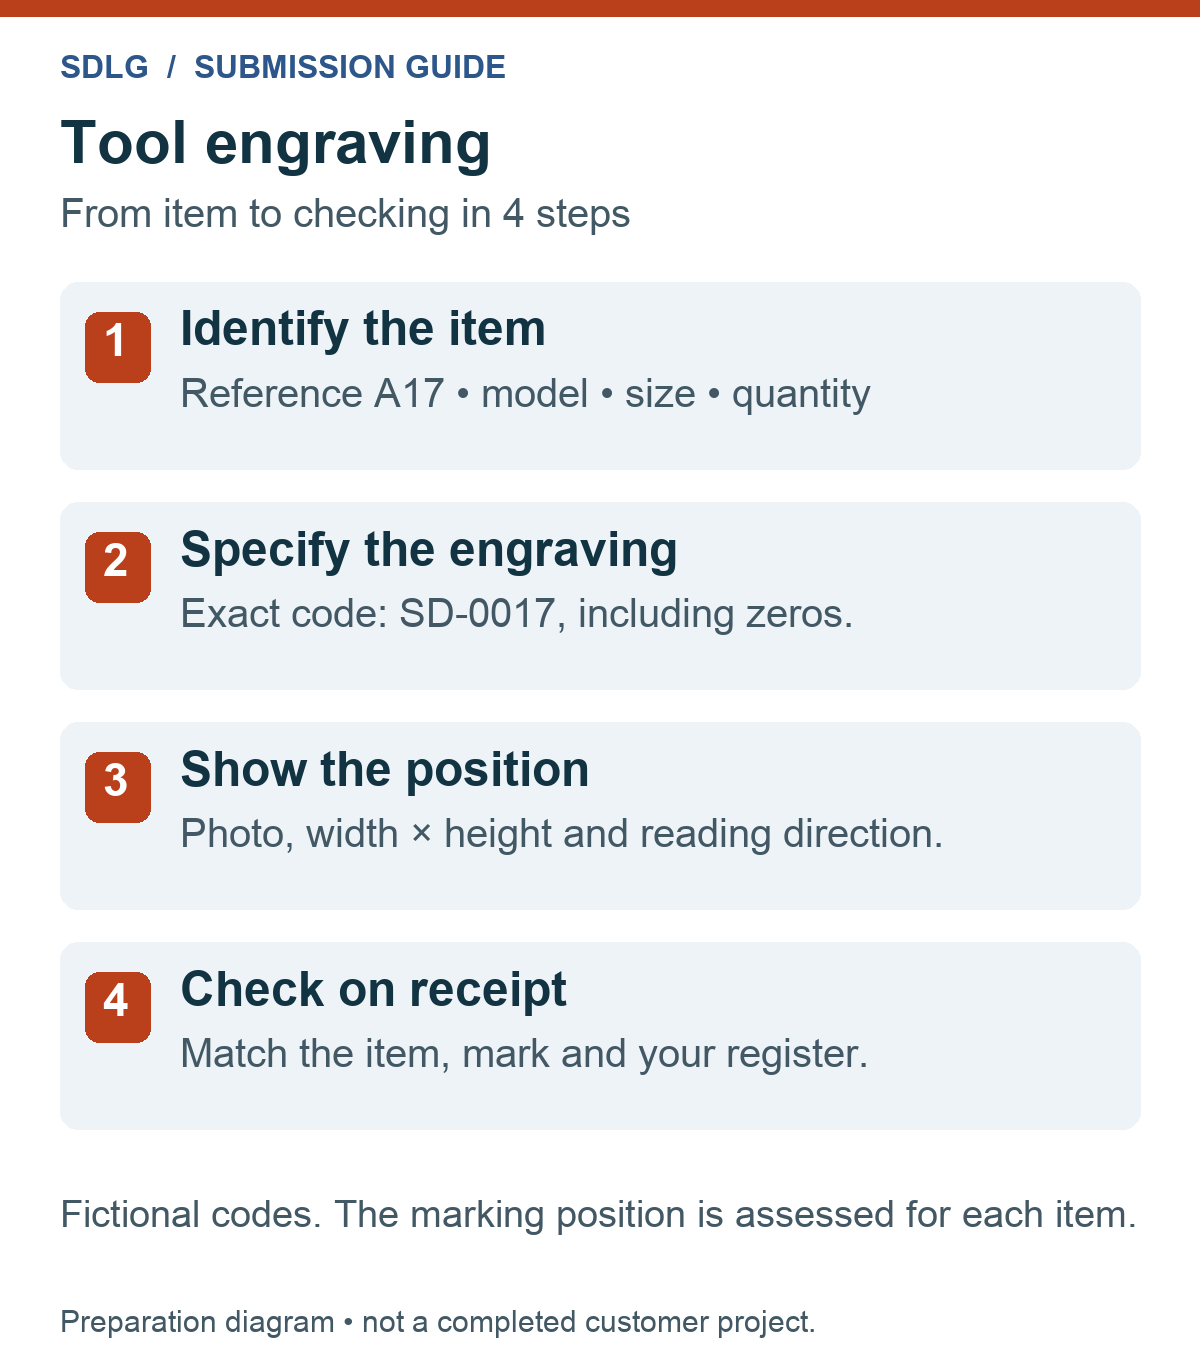
- Supply reference: how do we identify the physical item?
- Product: brand, model and size if required.
- Engraving: exact name or code, including hyphens and zeros.
- Position: a photo reference and reading direction.
- Quantity: number of identical specifications on this row.
For identical items, state whether all receive the same company name or their own number. Identify new and previously used tools separately. Describe existing engravings and damage so the intended result is clear.
For larger batches, submitting names and numbers for batch engraving explains a more detailed checking approach. Supply one final list and refer to the relevant item reference for changes.
A marking becomes a management aid with a current register
Your register can hold model, location, responsible colleague and maintenance details for each number. They need not all appear on the tool. The small marking stays readable while the records can develop.
On receipt, link code and item, for example with a photograph. Check numbers when issuing or returning items and update changes. Engraving does not record movements; your own system still requires an action.
A QR code can refer to an internal record but needs adequate space and reliable scanning on the actual surface. A short readable code alongside provides a manual fallback. Have scannable codes assessed beforehand.
Example: two installation teams with changing staff
Suppose two teams use the same types of hand tools. Give each suitable item a company name and unique number. The register records its current vehicle or team. When personnel change, update the allocation while keeping the marking unchanged.
For a later additional set, continue from the agreed number. Decide whether a replacement receives a new number, avoiding two physical items circulating under one old code. This is an organisational example to discuss, not a completed customer project.
Marking can assist recognition and organisation but does not guarantee prevention of loss, theft or every form of wear. Assess the result in the actual working environment.
Link a number to a specific item
The CampPlus project shows individual numbering alongside a fixed identity. These are identification plates, not tools. The data principle also applies to an inventory register: one reference belongs to one item; the suitable marking position on a tool needs separate assessment.

Frequently asked questions about tool engraving
Can tool engraving replace a manufacturer’s code?
Your inventory number serves a different purpose from the manufacturer’s model, serial or size information. Keep that information identifiable and mark the proposed extra code’s position on a photograph. Each item’s marking area is assessed.
Should a tool, battery and case share one number?
That depends on your inventory system. Decide whether they form a fixed set or can be issued separately. Agree the relationship before preparing the engraving list; SDLG does not choose your inventory structure for you.
How do I supply used and new sets together?
Make sets and item references identifiable and describe existing marks or damage. Include photographs of different surfaces. This allows the proposed position to be assessed without confusing an old engraving with the new instruction.
Does the CampPlus photograph show tool engraving?
No. It shows numbered plastic identification plates. The photograph illustrates a fixed company identity combined with a unique code. For tool engraving, the actual tool, material and proposed surface need separate assessment.
What should I check when the tools are returned?
Match every code to your list and the correct physical item. Check placement and readability in its working position, then link it to your register. The engraving itself does not record later issue or maintenance.
Request a proposal for your tools
Specify models, quantities, intended codes and required receipt date. Include photographs and special use requirements. For tool engraving we assess each product’s material, accessibility and marking position.
The number of different models and positions affects preparation. A batch of identical items differs from a collection of varied tools of the same quantity. We agree supply arrangements and planning beforehand.
SDLG works from Breda and ships products throughout the Netherlands and Belgium. Discussions, drop-off and collection are by appointment. See our contact details and directions.
Production and delivery
Lead time: 1–5 working days, subject to stock availability. For larger projects, we agree the lead time individually. The schedule is confirmed after checking stock and the proposed work. Shipping transit time is separate. Delivery and shipping guidance.